n8n FFmpeg Media Processing: Automate Video Workflows Like a Pro
Your n8n instance can do something most automation platforms can’t: process videos without expensive third-party APIs. While other tools force you to pay per video or connect to costly cloud services, n8n lets you harness the same technology that powers YouTube, Netflix, and Instagram. The secret is FFmpeg, and most n8n users have no idea it exists.
Video processing is one of the most requested automation features. Content creators need thumbnails generated automatically. Marketing teams want videos resized for every social platform. Agencies need to watermark client deliverables. Doing this manually wastes hours every week. Third-party APIs charge anywhere from $0.01 to $0.10 per video, which adds up fast when you process thousands of files.
FFmpeg changes everything. It runs directly on your n8n server, processes unlimited videos, and costs nothing beyond your existing infrastructure.
The Hidden Power Most n8n Users Miss
FFmpeg is a free, open-source command-line tool that handles virtually any media processing task imaginable. It converts formats, compresses files, extracts thumbnails, adds watermarks, merges clips, and much more. Every major streaming platform uses FFmpeg under the hood.
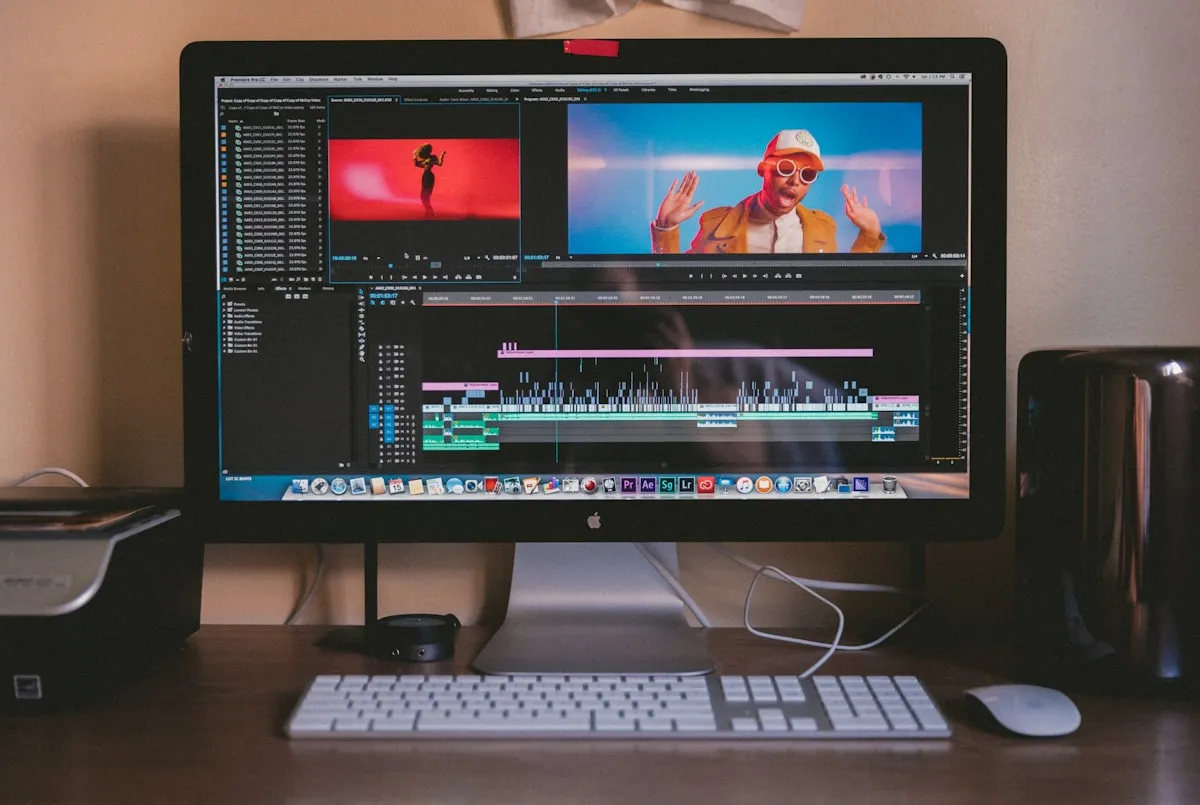
The best part? n8n can run FFmpeg commands directly through the Execute Command node. This means you can build complete video processing pipelines without writing custom code or paying for external services.
However, this capability comes with a catch: FFmpeg only works on self-hosted n8n instances. If you’re using n8n Cloud, you’ll need to switch to self-hosting or use an FFmpeg API service. Our cloud vs self-hosted comparison helps you understand the trade-offs.
What You’ll Learn
- How to set up FFmpeg in your n8n Docker environment
- Essential FFmpeg commands for video conversion, compression, thumbnails, and watermarks
- Complete workflow examples you can copy and customize
- How to handle large video files without crashing your instance
- Troubleshooting common FFmpeg errors in n8n
- Performance optimization techniques for faster processing
How FFmpeg Works with n8n
Before diving into setup, let’s understand the relationship between FFmpeg and n8n. This foundation helps you troubleshoot issues and build more sophisticated workflows.
What is FFmpeg?
FFmpeg is a complete, cross-platform solution for recording, converting, and streaming audio and video. It supports nearly every format in existence, from ancient AVI files to cutting-edge AV1 encoded content.
FFmpeg handles:
- Format conversion between any video/audio formats
- Transcoding with different codecs (H.264, H.265, VP9, AV1)
- Compression to reduce file sizes dramatically
- Scaling to resize videos for different platforms
- Trimming to extract specific segments
- Merging multiple clips into one file
- Filters for effects, overlays, and watermarks
- Thumbnail extraction at any timestamp
The command-line interface might seem intimidating at first, but the basic syntax is straightforward:
ffmpeg -i input.mp4 [options] output.mp4Everything between the input and output files controls what happens to your media.
The Execute Command Node
n8n’s Execute Command node runs shell commands on your server. This is how you access FFmpeg (and any other command-line tool) from within your workflows.
Important limitation: The Execute Command node is not available on n8n Cloud. It only works on self-hosted instances because it requires direct access to the server’s operating system.
When you run a command through this node, n8n:
- Executes the command in the server’s shell
- Captures the standard output (stdout) and error output (stderr)
- Returns the results to your workflow
For FFmpeg, this means you can process files stored on your server and integrate the results with other nodes like HTTP Request, Google Drive, or S3.
When to Use FFmpeg vs API Services
Both approaches have their place. Here’s when each makes sense:
| Factor | FFmpeg (Self-Hosted) | API Services (Cloudinary, etc.) |
|---|---|---|
| Cost | Free (just server resources) | Pay per video/operation |
| Speed | Depends on your hardware | Usually faster CDN delivery |
| Control | Full control over every parameter | Limited to API options |
| Scalability | Limited by server capacity | Virtually unlimited |
| Setup complexity | Requires Docker knowledge | Just add credentials |
| File size limits | Your server’s storage | Typically 100MB-2GB |
| Best for | High volume, custom needs | Quick setup, CDN delivery |
Use FFmpeg when:
- You process many videos and want to minimize costs
- You need specific codec settings or filters not available in APIs
- Your videos contain sensitive content you can’t upload to third parties
- You already have a self-hosted n8n instance
Use API services when:
- You’re on n8n Cloud and can’t self-host
- You need CDN delivery and don’t want to manage storage
- Setup speed matters more than per-video costs
- You process occasional videos, not thousands
Complete Docker Setup Guide
Getting FFmpeg into your n8n environment requires a custom Docker image. The default n8n image doesn’t include FFmpeg because it adds significant size and not everyone needs it.
Why You Need a Custom Docker Image
The official n8n Docker image is based on Alpine Linux, a minimal distribution that keeps the image small. FFmpeg isn’t included by default, so running ffmpeg in the Execute Command node fails with “command not found.”
You have three options:
- Build a custom image that adds FFmpeg to n8n (recommended)
- Use a pre-built community image that includes FFmpeg
- Use an FFmpeg API service if you can’t modify your Docker setup
Option 1: Custom Dockerfile (Recommended)
This approach gives you full control and ensures you’re using the official n8n image as a base.
Create a Dockerfile:
FROM docker.n8n.io/n8nio/n8n
USER root
RUN apk --update add ffmpeg
USER node
That’s it. Four lines. The key points:
USER roottemporarily switches to the root user (required to install packages)apk --update add ffmpeginstalls FFmpeg using Alpine’s package managerUSER nodeswitches back to the node user for security
Build the image:
docker build -t n8n-ffmpeg .Update your docker-compose.yml:
version: '3.8'

services:
  n8n:
    image: n8n-ffmpeg
    restart: always
    ports:
      - "5678:5678"
    environment:
      - DB_TYPE=postgresdb
      - DB_POSTGRESDB_HOST=postgres
      - DB_POSTGRESDB_PORT=5432
      - DB_POSTGRESDB_DATABASE=n8n
      - DB_POSTGRESDB_USER=n8n
      - DB_POSTGRESDB_PASSWORD=${POSTGRES_PASSWORD}
      - N8N_ENCRYPTION_KEY=${N8N_ENCRYPTION_KEY}
    volumes:
      - n8n_data:/home/node/.n8n
      - ./files:/files
    depends_on:
      - postgres

  postgres:
    image: postgres:15
    restart: always
    environment:
      POSTGRES_USER: n8n
      POSTGRES_PASSWORD: ${POSTGRES_PASSWORD}
      POSTGRES_DB: n8n
    volumes:
      - postgres_data:/var/lib/postgresql/data

volumes:
  n8n_data:
  postgres_data:
Notice the ./files:/files volume mount. This creates a shared directory where you can store input and output video files. More on this in the binary data section.
For a complete Docker setup guide, including PostgreSQL configuration and SSL, check our n8n Docker setup guide.
Option 2: Pre-built Docker Image
The community has created ready-to-use images with FFmpeg pre-installed.
n8n-docker-ffmpeg on GitHub provides a complete Docker Compose setup with:
- n8n with FFmpeg installed
- Caddy for automatic SSL certificates
- Systemd configuration for auto-start
- Reverse proxy setup
This option is ideal if you want a turnkey solution without building custom images.
When to use pre-built images:
- You want the fastest possible setup
- You’re comfortable trusting community-maintained images
- You don’t need to customize the FFmpeg installation
When to build your own:
- You need specific FFmpeg compile options
- Security requirements mandate using official base images
- You want to control exactly what’s installed
Option 3: FFmpeg API Services
If self-hosting isn’t an option, several services provide FFmpeg functionality through APIs:
- Rendi offers a dedicated n8n integration for running FFmpeg commands
- FFmpegAPI.com provides REST endpoints for common operations
- Cloudinary handles transformations through URL parameters
These services charge per operation but eliminate setup complexity entirely.
Verifying Your Installation
After deploying your FFmpeg-enabled n8n instance, verify the installation works:
- Create a new workflow
- Add an Execute Command node
- Set the command to:
ffmpeg -version - Execute the workflow
You should see output showing the FFmpeg version and configuration:
ffmpeg version 6.0 Copyright (c) 2000-2023 the FFmpeg developers
built with gcc 12.2.1 (Alpine 12.2.1_git20220924-r4)
configuration: --enable-gpl --enable-version3 ...
If you see “command not found,” your custom image isn’t being used. Check that you rebuilt the container after updating docker-compose.yml.
15 FFmpeg Commands Every n8n User Needs
Now for the practical part. These commands cover 90% of video automation use cases. Each example shows the full command for the Execute Command node.
Video Conversion
Convert to MP4 (H.264):
ffmpeg -i /files/input.mov -c:v libx264 -c:a aac /files/output.mp4This converts any input format to MP4 with H.264 video and AAC audio. The most universally compatible combination for web and mobile.
Convert to WebM (VP9):
ffmpeg -i /files/input.mp4 -c:v libvpx-vp9 -c:a libopus /files/output.webmWebM offers better compression than H.264 at the cost of encoding speed. Great for web delivery when file size matters.
Convert audio only (MP4 to MP3):
ffmpeg -i /files/input.mp4 -vn -c:a libmp3lame -q:a 2 /files/output.mp3The -vn flag removes the video stream. -q:a 2 sets high audio quality (0-9, lower is better).
Video Compression
Compression is about finding the right balance between file size and quality.
Standard compression (CRF method):
ffmpeg -i /files/input.mp4 -c:v libx264 -crf 23 -c:a aac -b:a 128k /files/output.mp4The CRF (Constant Rate Factor) value controls quality:
- 18-20: Visually lossless, large files
- 21-23: High quality, good compression (recommended default)
- 24-28: Acceptable quality, smaller files
- 29+: Noticeable quality loss
Aggressive compression for web:
ffmpeg -i /files/input.mp4 -c:v libx264 -crf 28 -preset fast -c:a aac -b:a 96k /files/output.mp4The -preset option trades encoding speed for compression efficiency:
ultrafast- Fastest encoding, largest filesfast- Good balancemedium- Defaultslow- Better compression, slowerveryslow- Best compression, very slow
Target file size compression:
ffmpeg -i /files/input.mp4 -c:v libx264 -b:v 1M -c:a aac -b:a 128k /files/output.mp4Using -b:v 1M targets approximately 1 Mbps video bitrate. Useful when you need files under a specific size.
Resizing and Scaling
Resize to specific dimensions:
ffmpeg -i /files/input.mp4 -vf "scale=1280:720" -c:a copy /files/output.mp4The scale filter sets exact width and height. -c:a copy preserves the original audio without re-encoding.
Resize maintaining aspect ratio:
ffmpeg -i /files/input.mp4 -vf "scale=1280:-1" -c:a copy /files/output.mp4Using -1 for height (or width) automatically calculates the dimension to maintain the original aspect ratio.
Resize for Instagram/TikTok (9:16 vertical):
ffmpeg -i /files/input.mp4 -vf "scale=1080:1920:force_original_aspect_ratio=decrease,pad=1080:1920:(ow-iw)/2:(oh-ih)/2" -c:a copy /files/output.mp4This command:
- Scales the video to fit within 1080x1920
- Adds black padding to fill the remaining space
- Centers the video within the frame
Thumbnail Generation
Extract single frame:
ffmpeg -i /files/input.mp4 -ss 00:00:05 -frames:v 1 /files/thumbnail.jpgThe -ss 00:00:05 seeks to the 5-second mark. -frames:v 1 extracts exactly one frame.
Extract multiple thumbnails:
ffmpeg -i /files/input.mp4 -vf "fps=1/30" /files/thumb_%03d.jpgThis extracts one frame every 30 seconds. %03d creates numbered files: thumb_001.jpg, thumb_002.jpg, etc.
Create thumbnail grid/contact sheet:
ffmpeg -i /files/input.mp4 -vf "select=not(mod(n\,300)),scale=320:180,tile=4x4" -frames:v 1 /files/contact_sheet.jpgThis creates a 4x4 grid of thumbnails, taking one frame every 300 frames (approximately every 10 seconds at 30fps).
Audio Operations
Extract audio from video:
ffmpeg -i /files/input.mp4 -vn -c:a copy /files/audio.aacThe -vn removes video, -c:a copy extracts audio without re-encoding (preserves original quality).
Replace audio track:
ffmpeg -i /files/video.mp4 -i /files/new_audio.mp3 -c:v copy -c:a aac -map 0:v:0 -map 1:a:0 /files/output.mp4This takes video from the first input and audio from the second input.
Adjust volume:
ffmpeg -i /files/input.mp4 -af "volume=1.5" -c:v copy /files/output.mp4volume=1.5 increases volume by 50%. Use volume=0.5 to reduce by 50%.
Watermarking and Overlays
Add logo watermark:
ffmpeg -i /files/input.mp4 -i /files/logo.png -filter_complex "overlay=W-w-10:H-h-10" -c:a copy /files/output.mp4This places the logo in the bottom-right corner with 10-pixel padding.
Position options for overlays:
- Top-left:
overlay=10:10 - Top-right:
overlay=W-w-10:10 - Bottom-left:
overlay=10:H-h-10 - Bottom-right:
overlay=W-w-10:H-h-10 - Center:
overlay=(W-w)/2:(H-h)/2
Add text watermark:
ffmpeg -i /files/input.mp4 -vf "drawtext=text='My Brand':fontsize=24:fontcolor=white:x=10:y=10" -c:a copy /files/output.mp4For custom fonts, you’ll need to install them in your Docker image and specify the font file path.
Trimming and Concatenation
Trim video segment:
ffmpeg -i /files/input.mp4 -ss 00:00:30 -to 00:01:30 -c copy /files/clip.mp4This extracts from 30 seconds to 1 minute 30 seconds. -c copy avoids re-encoding for faster processing.
Concatenate multiple videos:
First, create a text file listing the videos:
echo "file '/files/video1.mp4'
file '/files/video2.mp4'
file '/files/video3.mp4'" > /files/list.txt
Then concatenate:
ffmpeg -f concat -safe 0 -i /files/list.txt -c copy /files/merged.mp4This method works when all videos have the same codec and resolution. For mixed formats, you’ll need to re-encode.
Production-Ready n8n FFmpeg Workflows
Let’s put these commands into complete workflows you can import and customize.
Automated Thumbnail Generator
This workflow accepts a video URL, downloads it, extracts a thumbnail, and returns the image.
Workflow structure:
- Webhook - Receives video URL
- HTTP Request - Downloads the video
- Write Binary File - Saves to disk
- Execute Command - Runs FFmpeg
- Read Binary File - Loads the thumbnail
- Respond to Webhook - Returns the image
Execute Command configuration:
ffmpeg -y -i /files/input_{{ $json.videoId }}.mp4 -ss 00:00:05 -frames:v 1 -q:v 2 /files/thumb_{{ $json.videoId }}.jpgThe -y flag overwrites existing files without prompting. Using {{ $json.videoId }} creates unique filenames for each request.
Key considerations:
- Add error handling for invalid URLs or corrupt videos
- Clean up temporary files after processing
- Set appropriate timeout values for large videos
For debugging complex workflows like this, our free workflow debugger helps identify issues quickly.
Social Media Video Processor
This workflow takes any video and outputs versions optimized for different platforms.
Platform specifications:
| Platform | Resolution | Aspect Ratio | Max File Size |
|---|---|---|---|
| Instagram Feed | 1080x1080 | 1:1 | 650MB |
| Instagram Reels | 1080x1920 | 9:16 | 650MB |
| TikTok | 1080x1920 | 9:16 | 287MB |
| YouTube Shorts | 1080x1920 | 9:16 | 60 seconds |
| 1920x1200 | 16:9 | 512MB |
Instagram Reels command:
ffmpeg -i /files/input.mp4 -vf "scale=1080:1920:force_original_aspect_ratio=decrease,pad=1080:1920:(ow-iw)/2:(oh-ih)/2,setsar=1" -c:v libx264 -crf 23 -preset fast -c:a aac -b:a 128k -movflags +faststart /files/instagram_reels.mp4The -movflags +faststart flag moves metadata to the beginning of the file, enabling faster playback start on social platforms.
Workflow approach:
- Accept video via webhook or cloud storage trigger
- Branch into parallel paths for each platform
- Run platform-specific FFmpeg commands
- Upload results to respective destinations
Bulk Video Converter
Processing multiple videos from cloud storage requires careful workflow design.
Google Drive integration example:
- Google Drive Trigger - Watches for new files in a folder
- Google Drive Download - Gets the file content
- Write Binary File - Saves locally
- Execute Command - Processes with FFmpeg
- Read Binary File - Loads the result
- Google Drive Upload - Saves to output folder
- Execute Command - Cleans up temp files
Cleanup command:
rm /files/input_{{ $json.fileId }}.* /files/output_{{ $json.fileId }}.*Always clean up temporary files to prevent disk space issues over time.
Error handling pattern:
Add an Error Trigger node to catch failures and:
- Log the error details
- Move failed files to a review folder
- Send notification to Slack or email
For guidance on building robust error handling, see our workflow best practices guide.
Video-to-Audio Extractor
Perfect for creating podcast content from video recordings or extracting audio for transcription.
High-quality extraction:
ffmpeg -i /files/input.mp4 -vn -c:a libmp3lame -q:a 0 /files/output.mp3Batch processing approach:
If you have many videos to process, consider using queue mode to distribute the workload across multiple workers. Video processing is CPU-intensive, and queue mode prevents a single long-running execution from blocking other workflows.
Working with Video Files in n8n
Understanding how n8n handles files is crucial for building reliable video workflows.
File Paths and Storage
When using FFmpeg in Docker, you work with paths inside the container, not your host machine.
The /files directory approach:
In the docker-compose.yml example above, we mounted ./files:/files. This means:
- Files in
./fileson your host appear at/filesin the container - FFmpeg commands use
/files/filename.mp4paths - Output files appear in
./fileson your host
Using /tmp for temporary files:
For files you don’t need to persist:
ffmpeg -i /tmp/input.mp4 -c:v libx264 /tmp/output.mp4The /tmp directory is cleared on container restart, which helps with automatic cleanup but means you’ll lose files if the container restarts mid-processing.
Binary Data Flow
A typical video processing workflow moves data through several stages:
HTTP Request (download) → Write Binary File → Execute Command → Read Binary File → HTTP Request (upload)Writing binary data to disk:
Use the “Read/Write Files from Disk” node with operation “Write File to Disk”:
- File Path:
/files/{{ $json.filename }} - Input Binary Field:
data(default from HTTP Request)
Reading processed files:
After FFmpeg processes the file, use the same node with operation “Read File from Disk”:
- File Path:
/files/output_{{ $json.filename }}
The binary data is then available for upload to cloud storage or returning via webhook.
Large File Handling
Video files can easily reach gigabytes. This creates challenges.
Memory considerations:
n8n loads binary data into memory when using the standard file nodes. A 2GB video file requires at least 2GB of available RAM just to hold the data.
Solutions for large files:
- Increase container memory:
services:
  n8n:
    deploy:
      resources:
        limits:
memory: 4G- Process without loading into n8n:
If videos are already on disk (from a mounted volume or previous download), FFmpeg can process them directly without n8n ever loading them into memory:
ffmpeg -i /files/large_video.mp4 -c:v libx264 -crf 28 /files/compressed.mp4- Use external storage for queue mode:
When running multiple n8n workers, binary data must be accessible to all workers. Configure S3 binary data mode to store files externally:
N8N_DEFAULT_BINARY_DATA_MODE=s3
N8N_EXTERNAL_STORAGE_S3_BUCKET_NAME=your-bucket- Stream directly from URLs:
FFmpeg can process videos directly from URLs without downloading first:
ffmpeg -i "https://example.com/video.mp4" -c:v libx264 /files/output.mp4This approach saves disk space but requires a stable network connection.
Common Problems and Solutions
Even with everything configured correctly, you’ll encounter issues. Here are the most common problems and their solutions.
”Command not found” Errors
Symptom: Execute Command node returns “ffmpeg: command not found”
Causes and fixes:
-
FFmpeg not installed in container:
- Verify you’re using your custom image, not the default
- Rebuild the container:
docker compose up -d --build
-
Using wrong image:
- Check docker-compose.yml points to
n8n-ffmpeg(or your custom image name) - Run
docker compose psto verify the correct image is running
- Check docker-compose.yml points to
-
PATH issues:
- Try the full path:
/usr/bin/ffmpeg -version - Check where FFmpeg is installed:
which ffmpeg
- Try the full path:
Diagnostic command:
docker exec -it your_n8n_container which ffmpegThis should return /usr/bin/ffmpeg.
Permission Denied
Symptom: “Permission denied” when reading or writing files
Causes and fixes:
-
File ownership issues:
The n8n container runs as the
nodeuser (UID 1000). Files must be readable/writable by this user.# On your host, fix ownership of the files directory sudo chown -R 1000:1000 ./files -
Volume mount permissions:
In some systems, you need to specify user mapping:
services: n8n: user: "1000:1000" -
SELinux issues (RHEL/CentOS):
Add
:zto volume mounts:volumes: - ./files:/files:z
Memory Errors with Large Files
Symptom: Container crashes or n8n becomes unresponsive when processing large videos
Causes and fixes:
-
Insufficient container memory:
Increase the limit in docker-compose.yml:
deploy: resources: limits: memory: 8G -
Node.js heap limit:
The default heap size may be too small:
environment: - NODE_OPTIONS=--max-old-space-size=4096 -
Process files without loading:
Use FFmpeg’s streaming capabilities and avoid loading entire files into n8n’s memory.
Output Quality Issues
Symptom: Processed videos look pixelated or have artifacts
Causes and fixes:
-
CRF too high:
Lower the CRF value. Try
18instead of23for visually lossless output. -
Wrong codec for content:
Animation and screen recordings compress differently than natural video. Use:
ffmpeg -i input.mp4 -c:v libx264 -tune animation -crf 20 output.mp4Other tune options:
film,animation,grain,stillimage,psnr,ssim -
Resolution scaling artifacts:
Use a better scaling algorithm:
ffmpeg -i input.mp4 -vf "scale=1280:720:flags=lanczos" output.mp4Lanczos provides the best quality for downscaling.
Timeout Problems
Symptom: Long videos cause execution timeouts
Video processing can take minutes or even hours for large files. Default timeout settings often aren’t enough.
Solutions:
-
Increase workflow timeout:
Set
EXECUTIONS_TIMEOUTenvironment variable to a higher value (in seconds):environment: - EXECUTIONS_TIMEOUT=3600 # 1 hour -
Use async processing:
For very long operations, trigger the FFmpeg command and poll for completion rather than waiting synchronously.
-
Break into chunks:
Split long videos into segments, process in parallel, then concatenate.
For more timeout solutions, see our timeout troubleshooting guide.
Optimizing FFmpeg Performance
Once your workflows are running, these optimizations help them run faster.
Hardware Acceleration
Modern CPUs include hardware video encoding capabilities that dramatically speed up processing.
Intel Quick Sync (Intel CPUs):
ffmpeg -i input.mp4 -c:v h264_qsv -preset faster output.mp4NVIDIA NVENC (NVIDIA GPUs):
ffmpeg -i input.mp4 -c:v h264_nvenc -preset fast output.mp4Apple VideoToolbox (macOS):
ffmpeg -i input.mp4 -c:v h264_videotoolbox output.mp4Hardware acceleration requires proper drivers and Docker GPU passthrough configuration, which adds complexity. For most n8n use cases, software encoding is sufficient.
Preset Selection
The -preset option offers the biggest speed/quality trade-off:
| Preset | Encoding Speed | File Size | Use Case |
|---|---|---|---|
ultrafast | Fastest | Largest | Testing, preview |
superfast | Very fast | Large | Quick processing |
veryfast | Fast | Medium-large | Balanced speed |
faster | Above average | Medium | Good balance |
fast | Average | Medium | Recommended |
medium | Default | Default | Standard |
slow | Below average | Smaller | Quality focus |
slower | Slow | Small | High quality |
veryslow | Slowest | Smallest | Maximum compression |
For automation workflows, fast or faster usually provides the best balance. Use ultrafast for preview generations where quality doesn’t matter.
Resource Management
Limit CPU threads:
ffmpeg -threads 4 -i input.mp4 -c:v libx264 output.mp4This prevents FFmpeg from consuming all available CPU cores, leaving resources for n8n and other processes.
Process sequentially:
Avoid running multiple FFmpeg commands simultaneously unless you have significant hardware resources. Use n8n’s queue mode to process videos one at a time with proper job management.
Monitor resource usage:
Add monitoring to your self-hosted setup to track CPU, memory, and disk usage during video processing. This helps you right-size your infrastructure and identify bottlenecks.
When to Get Professional Help
FFmpeg and video processing can get complex quickly. Consider professional assistance when:
- You need to process hundreds of videos daily and need optimized infrastructure
- Custom codec configurations or advanced filters are required
- High availability and failover are business requirements
- You’re migrating from expensive API services and want to minimize transition time
Our n8n consulting services include video processing workflow design, and our self-hosted setup service can configure FFmpeg-enabled infrastructure for you.
Frequently Asked Questions
Can I use FFmpeg on n8n Cloud?
No. The Execute Command node required to run FFmpeg is only available on self-hosted n8n instances. n8n Cloud doesn’t allow arbitrary command execution for security reasons.
Alternatives for cloud users:
- Switch to a self-hosted instance
- Use FFmpeg API services like Rendi or FFmpegAPI.com
- Use transformation services like Cloudinary that work through HTTP requests
Our n8n self-hosted setup service can help you migrate from cloud to self-hosted if video processing is important for your workflows.
How do I install FFmpeg in my existing n8n Docker setup?
You need to rebuild your Docker image to include FFmpeg. The process:
- Create a Dockerfile that extends the official n8n image and adds FFmpeg
- Build the new image
- Update docker-compose.yml to use your custom image
- Restart the containers with
docker compose up -d
The exact Dockerfile is shown in the setup section above. The entire process takes about 5 minutes if you’re comfortable with Docker.
Why is FFmpeg producing poor quality output?
The most common cause is using a CRF value that’s too high. The default CRF of 23 is good for most content, but if quality is critical, try CRF 18-20.
Other factors:
- Wrong tune setting: Use
-tune animationfor animated content or-tune filmfor movie-like content - Scaling algorithm: Use
flags=lanczosin the scale filter for better quality downscaling - Bitrate too low: If using bitrate mode instead of CRF, increase the target bitrate
Always test with a short segment before processing entire videos to verify quality meets your needs.
How do I process videos larger than 1GB?
Large files require special handling to avoid memory issues:
- Increase container memory to at least 2x the file size
- Use direct file paths instead of loading files into n8n’s binary data
- Configure S3 binary storage for distributed setups
- Consider chunked processing: Split videos into segments, process in parallel, then concatenate
For files over 5GB, streaming directly from source URLs to FFmpeg often works better than downloading first.
Can I run multiple FFmpeg processes simultaneously?
Yes, but carefully. Each FFmpeg process consumes significant CPU and memory. Running too many in parallel can crash your server or produce poor results due to resource contention.
Best practices:
- Limit concurrent processes to the number of CPU cores minus 2
- Use n8n’s queue mode to manage job concurrency
- Set per-process thread limits with
-threads - Monitor resource usage and adjust based on your hardware
For high-volume processing, consider dedicated workers that handle only video jobs, separate from workers handling lighter tasks.